Crispy Chicken Tenders With Honey Mustard
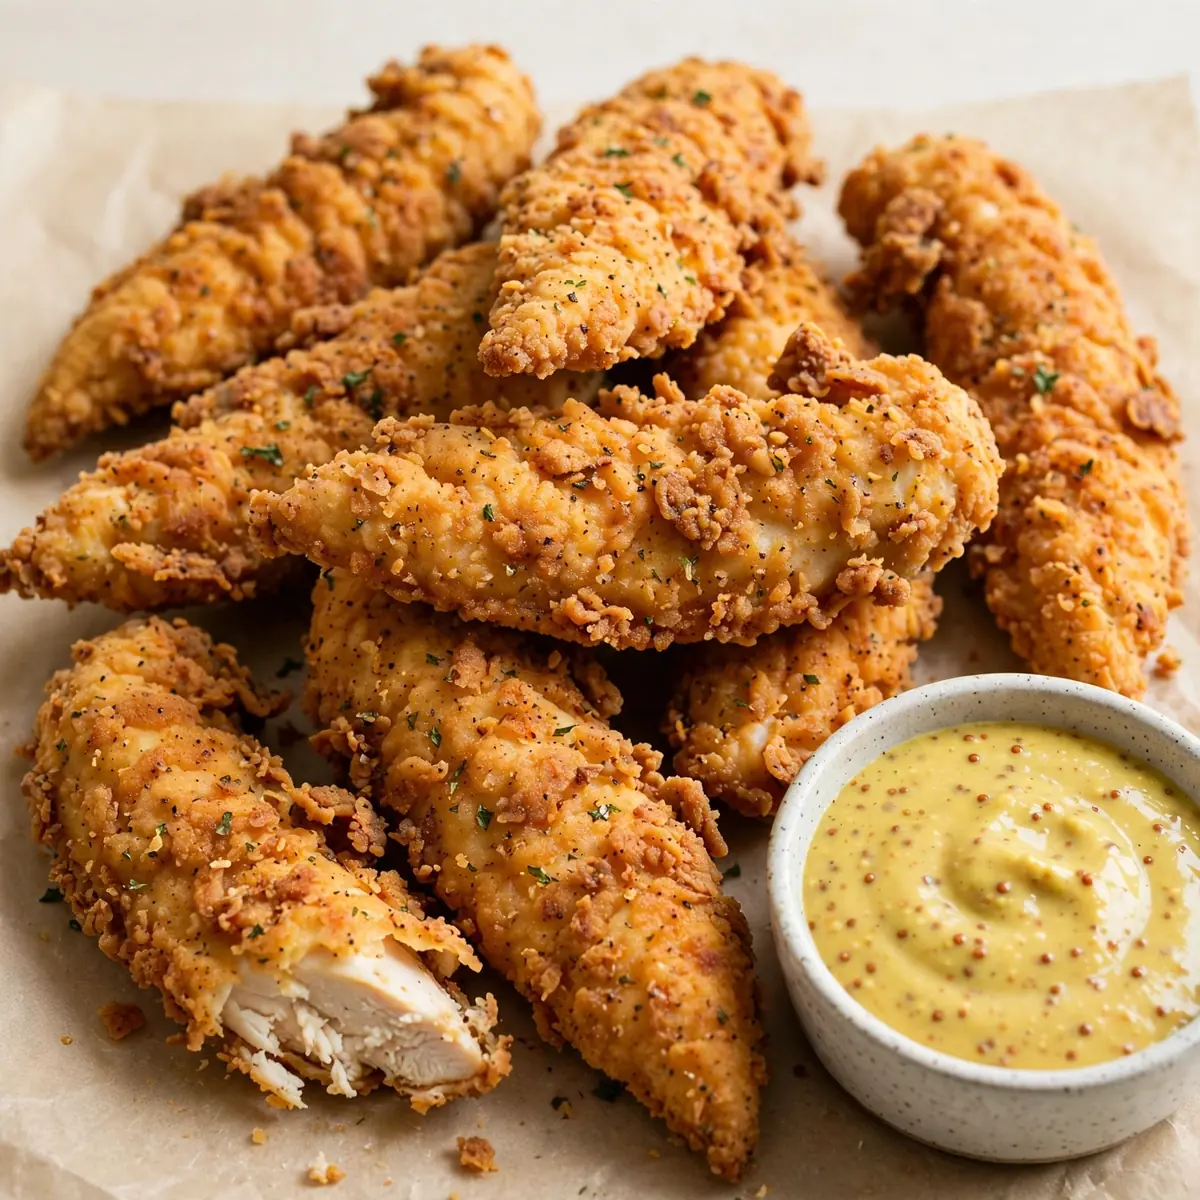
I’ve spent years trying to perfect a batch of chicken tenders that stay crunchy even on day three, and I finally cracked the code with this budget-friendly recipe. This Crispy Chicken Tenders with Honey Mustard approach is designed for the savvy cook who wants to prep a week’s worth of satisfying lunches or dinners without breaking the bank.
Recipe Overview
- Prep Time: 20 minutes
- Cook Time: 15 minutes
- Total Time: 35 minutes
- Servings: 4 generous portions (easily doubles for meal prep)
- Difficulty: Easy
Why You’ll Love This Crispy Chicken Tenders with Honey Mustard
- Cost-Effective Meal Prep: By buying chicken breast in bulk and using store-cupboard staples, each serving costs roughly £1.50 — far less than a takeaway or shop-bought equivalent.
- Stays Crispy for Days: The double-coating technique and proper cooling method ensure the coating remains crunchy when reheated, so your leftovers don’t turn into a sad, soggy mess.
- Weeknight Speed: From start to finish, this recipe takes just over half an hour, making it a realistic option for a busy Tuesday dinner that also yields tomorrow’s lunch.
- Customisable Heat Level: The honey mustard base is mild enough for children, but you can easily dial up the warmth with a pinch of cayenne or smoked paprika.
- One-Pan Cooking: You only need a single frying pan for the chicken and a small bowl for the sauce, which means less washing up — a genuine win after a long day.
Ingredients You’ll Need
- 500g chicken breast fillets, sliced into 2cm wide strips
- 100g plain flour
- 2 large eggs
- 150g panko breadcrumbs (or regular dried breadcrumbs)
- 1 teaspoon garlic powder
- 1 teaspoon onion powder
- ½ teaspoon smoked paprika
- ½ teaspoon salt
- ¼ teaspoon black pepper
- 4 tablespoons sunflower or vegetable oil, for frying
- 3 tablespoons runny honey
- 2 tablespoons wholegrain mustard
- 1 tablespoon Dijon mustard
- 1 tablespoon lemon juice
Tip: For the most economical meal prep, buy a whole chicken breast and slice it yourself — pre-sliced strips often cost twice as much per kilogram.
How to Make Crispy Chicken Tenders with Honey Mustard
- Set up your coating station. In a shallow bowl, combine the flour, garlic powder, onion powder, smoked paprika, salt, and black pepper. In a second bowl, beat the eggs until they are a uniform pale yellow and slightly frothy on top. In a third bowl, tip in the panko breadcrumbs. This assembly line makes the process smooth and keeps your hands from getting too sticky.
- Prepare the chicken strips. Pat the chicken strips dry with kitchen paper — this helps the flour adhere. Season them lightly with a pinch of extra salt. Working one strip at a time, dredge it in the seasoned flour, shaking off any excess. You should see a thin, even coating that feels dry to the touch.
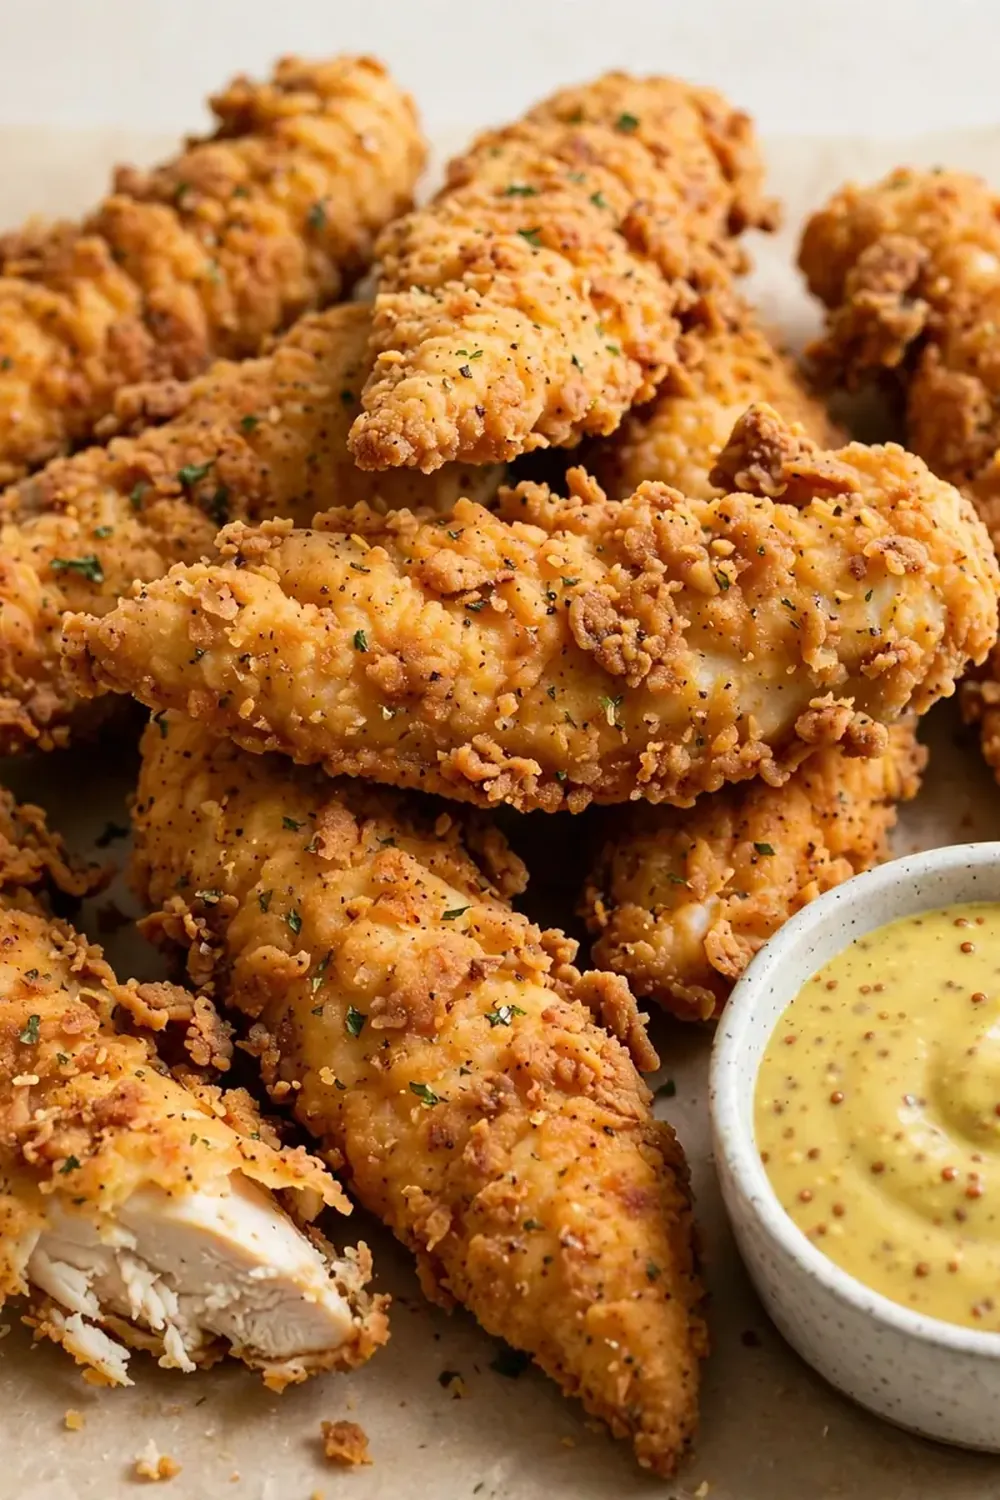
- Egg and breadcrumb coating. Dip the floured strip into the beaten eggs, letting any excess drip off. Then press it firmly into the panko breadcrumbs, turning to coat all sides. The strip should look craggy and textured, with crumbs clinging in a rough, uneven layer — that’s exactly what gives you maximum crunch.
- Heat the oil. Pour the sunflower oil into a large frying pan and set it over a medium-high heat. To test if it’s ready, drop a single breadcrumb into the oil — if it sizzles and dances immediately, the oil is hot enough. The oil should shimmer gently across the surface without smoking.
- Fry in batches. Carefully lay 4-5 coated strips into the hot oil, making sure they are not touching. You should hear a vigorous sizzle as they hit the pan. Cook for 3-4 minutes on the first side, until the underside is a deep golden brown with a crisp, firm crust. Flip the strips using tongs and cook for another 3-4 minutes. The cooked tenders should feel firm when pressed gently and the internal temperature should reach 74°C.
- Rest on a wire rack. Transfer the cooked tenders to a wire rack set over a baking tray — do not place them on paper towels, as this traps steam and softens the crust. Let them rest for at least 5 minutes. During this time, the crust will set and become even crunchier.
- Make the honey mustard sauce. While the chicken rests, whisk together the honey, wholegrain mustard, Dijon mustard, and lemon juice in a small bowl. The sauce should be thick enough to coat the back of a spoon, with visible mustard seeds throughout. Taste and adjust the sweetness or tanginess to your preference.
- Serve or store. Drizzle the honey mustard over the warm tenders or serve it on the side for dipping. If you are meal prepping, allow the tenders to cool completely on the wire rack before packing them into airtight containers.
Tips From My Kitchen
- Dry the chicken thoroughly: Moisture is the enemy of a crispy coating. I use kitchen paper to pat the strips completely dry before seasoning. Any residual water will create steam during frying, which lifts the breadcrumb layer away from the meat and leads to a patchy, soggy crust.
- Use panko breadcrumbs for superior crunch: Panko breadcrumbs are larger and flakier than standard dried breadcrumbs, which means they create more air pockets during frying. These pockets are what give the coating that satisfying, shattering crunch. If you only have regular breadcrumbs, toast them in a dry pan for 2 minutes to improve their texture.
- Do not skip the wire rack rest: I used to rest my fried chicken on paper towels until I realised the steam softened the bottom crust. A wire rack allows air to circulate all around the tenders, keeping every side crisp. This step is absolutely non-negotiable if you plan to reheat leftovers.
- Fry at a consistent temperature: If the oil is too cool, the coating absorbs fat and becomes greasy. If it is too hot, the outside burns before the chicken cooks through. I keep the heat at medium-high and adjust between batches, letting the oil come back up to temperature for 30 seconds before adding the next batch.
- Season the flour generously: The breadcrumbs alone will not provide enough flavour — the seasoning must go into the flour layer. This ensures that every bite, from the crust to the meat, is well-seasoned. I also add a pinch of salt to the egg wash for good measure.
- Double the batch for freezing: These tenders freeze beautifully after frying. I lay them in a single layer on a baking tray, freeze until solid, then transfer to a freezer bag. To reheat, I pop them straight from the freezer into a hot oven at 200°C for 10-12 minutes — no thawing required.
Equipment You’ll Need
- Large frying pan or skillet
- Sharp knife and cutting board
- 3 shallow bowls (for the coating station)
- Wooden spoon or spatula
- Tongs (for flipping the tenders safely)
- Wire rack and baking tray
- Small mixing bowl (for the sauce)
Common Mistakes to Avoid
- Overcrowding the pan: When you add too many tenders at once, the oil temperature drops dramatically. Instead of frying, the chicken begins to steam, resulting in a pale, oily coating. I never add more than five strips to a 28cm pan, and I always wait for the oil to come back up to temperature between batches.
- Wrong temperature: The ideal frying temperature is around 175°C. If you do not have a thermometer, test with a breadcrumb — it should sizzle on contact but not burn instantly. If the crumb turns black within 10 seconds, the oil is too hot. If it just sits there without sizzling, the oil is too cool.
- Skipping the rest time: I used to serve these straight from the pan, wondering why the coating fell off after the first bite. Resting the tenders on a wire rack for 5 minutes allows the crust to set and the internal juices to redistribute. This step prevents the dreaded “shell pulls away from the meat” situation.
Delicious Variations to Try
- Spicy Version: Add 1 teaspoon of cayenne pepper to the flour mixture and ½ teaspoon of chilli flakes to the panko breadcrumbs. For an extra kick, stir a teaspoon of hot sauce into the egg wash.
- Vegetarian/Vegan Option: Substitute the chicken with thick slices of firm tofu or large oyster mushrooms. Press the tofu for 30 minutes to remove excess moisture, then follow the same coating and frying method. Use a plant-based egg substitute, such as a mixture of 2 tablespoons of chickpea flour whisked with 3 tablespoons of water.
- Different Protein: This coating works beautifully on turkey breast strips or even firm white fish fillets like cod or haddock. Adjust the cooking time: fish will cook in about 2 minutes per side, while turkey may need an extra minute per side.
What to Serve With Crispy Chicken Tenders with Honey Mustard
- A simple green salad with a sharp vinaigrette to cut through the richness
- Sweet potato wedges roasted with a pinch of salt and smoked paprika
- Steamed broccoli or green beans tossed in a little butter
- Coleslaw made with a light yoghurt dressing for a refreshing crunch
- If you are planning a full meal prep, these tenders pair wonderfully with the Spicy Korean Beef Bulgogi Bowls for a week of varied lunches
Still hungry for ideas? You might also love Crispy Homemade Chicken Tenders, Honey Garlic Chicken Thighs Skillet from our sister kitchens.
Frequently Asked Questions
Crispy Chicken Tenders with Honey Mustard
Ingredients
Method
-
Set up your coating station. In a shallow bowl, combine the flour, garlic powder, onion powder, smoked paprika, salt, and black pepper. In a second bowl, beat the eggs until they are a uniform pale yellow and slightly frothy on top. In a third bowl, tip in the panko breadcrumbs. This assembly line makes the process smooth and keeps your hands from getting too sticky.
-
Prepare the chicken strips. Pat the chicken strips dry with kitchen paper — this helps the flour adhere. Season them lightly with a pinch of extra salt. Working one strip at a time, dredge it in the seasoned flour, shaking off any excess. You should see a thin, even coating that feels dry to the touch.
-
Egg and breadcrumb coating. Dip the floured strip into the beaten eggs, letting any excess drip off. Then press it firmly into the panko breadcrumbs, turning to coat all sides. The strip should look craggy and textured, with crumbs clinging in a rough, uneven layer — that’s exactly what gives you maximum crunch.
-
Heat the oil. Pour the sunflower oil into a large frying pan and set it over a medium-high heat. To test if it’s ready, drop a single breadcrumb into the oil — if it sizzles and dances immediately, the oil is hot enough. The oil should shimmer gently across the surface without smoking.
-
Fry in batches. Carefully lay 4-5 coated strips into the hot oil, making sure they are not touching. You should hear a vigorous sizzle as they hit the pan. Cook for 3-4 minutes on the first side, until the underside is a deep golden brown with a crisp, firm crust. Flip the strips using tongs and cook for another 3-4 minutes. The cooked tenders should feel firm when pressed gently and the internal temperature should reach 74°C.
-
Rest on a wire rack. Transfer the cooked tenders to a wire rack set over a baking tray — do not place them on paper towels, as this traps steam and softens the crust. Let them rest for at least 5 minutes. During this time, the crust will set and become even crunchier.
-
Make the honey mustard sauce. While the chicken rests, whisk together the honey, wholegrain mustard, Dijon mustard, and lemon juice in a small bowl. The sauce should be thick enough to coat the back of a spoon, with visible mustard seeds throughout. Taste and adjust the sweetness or tanginess to your preference.
-
Serve or store. Drizzle the honey mustard over the warm tenders or serve it on the side for dipping. If you are meal prepping, allow the tenders to cool completely on the wire rack before packing them into airtight containers.
Notes
I stumbled upon this combination by accident, and it’s been a hit ever since — mainly because it solves the perennial problem of making a budget-friendly meal that actually tastes like something special. I used to struggle with keeping my chicken tenders crispy after reheating until I discovered the wire rack resting technique, and now I batch cook these every single Sunday. Whether you are packing lunches for the week or feeding a hungry family on a Tuesday night, this recipe will become a regular in your rotation. If you give it a go, I would love to hear how it turned out in the comments below.