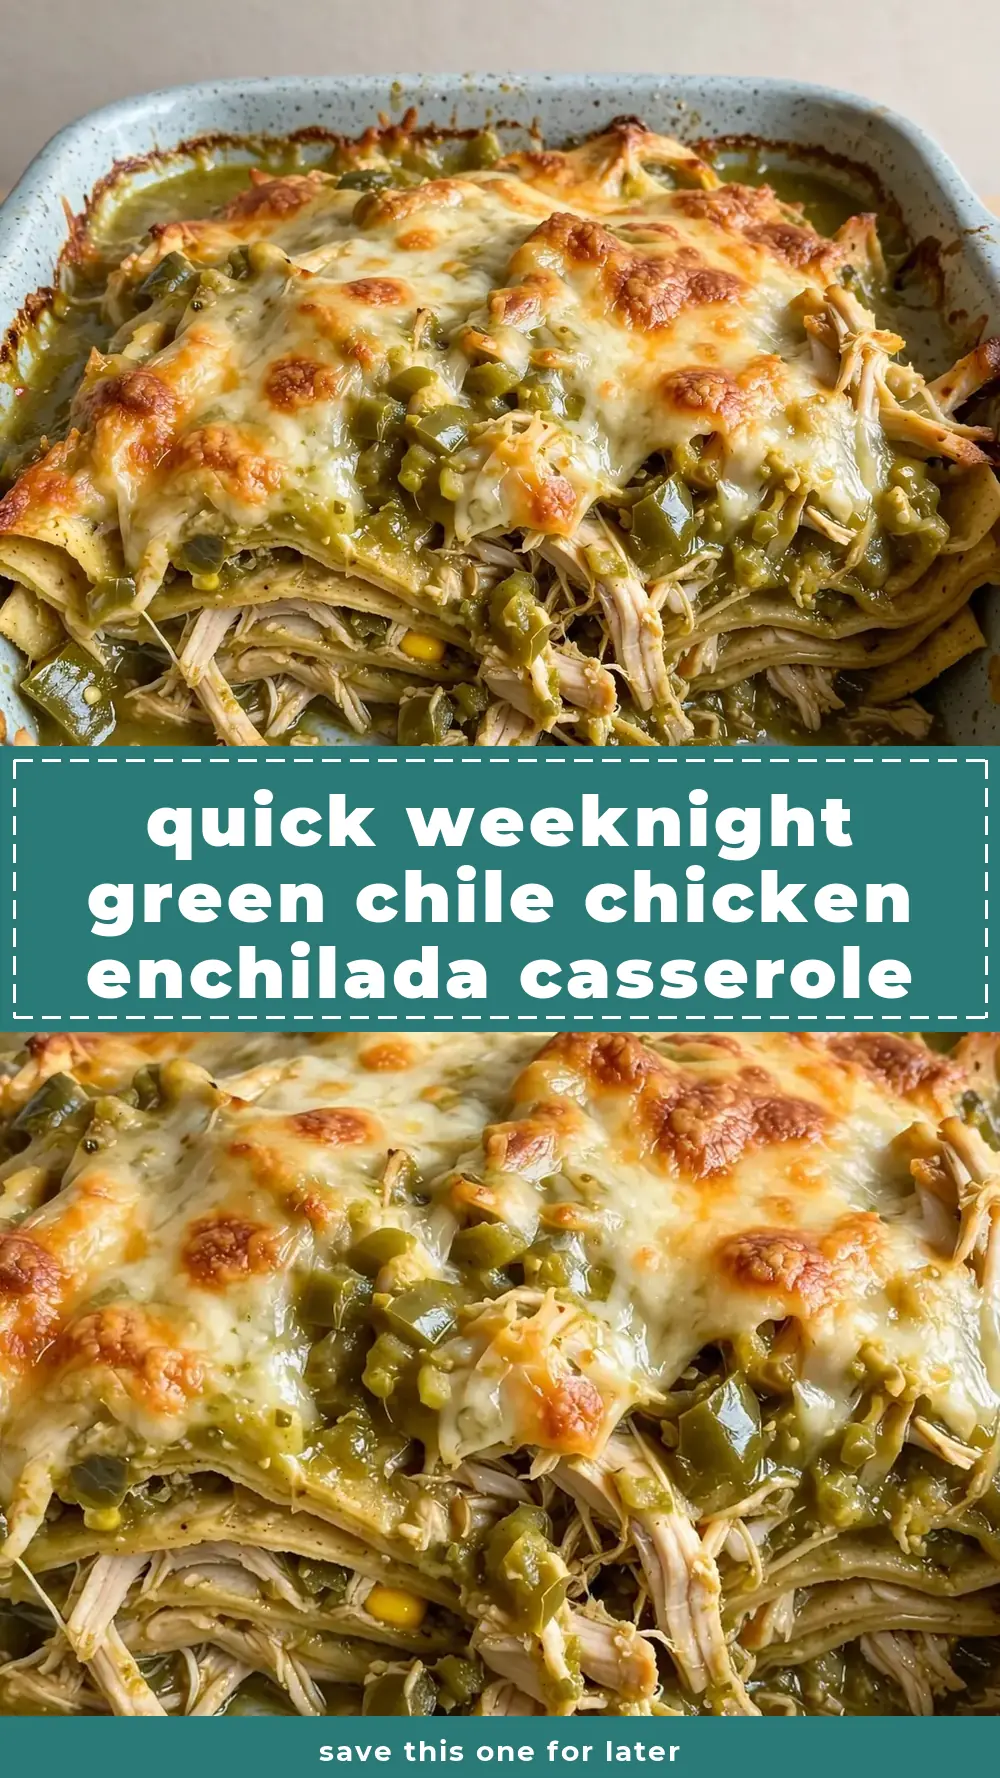
Quick Weeknight Green Chile Chicken Enchilada Casserole
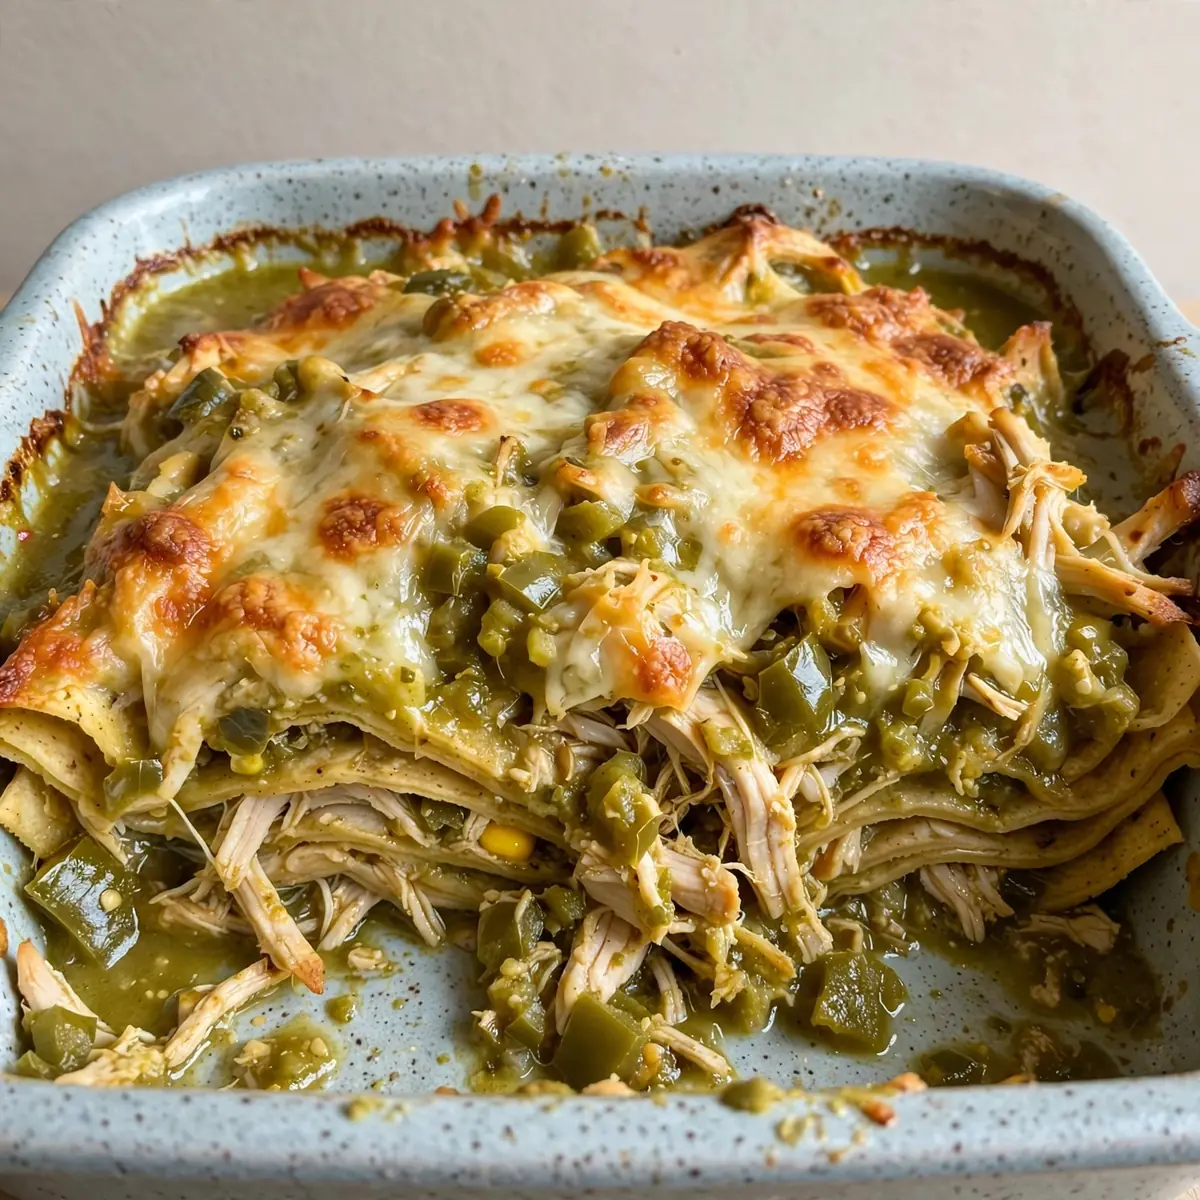
When the after-school chaos collides with evening meetings and the fridge seems full of nothing but half-empty jars, this Green Chile Chicken Enchilada Casserole is my lifeline. It comes together in the time it takes to help with homework, uses one baking dish, and delivers a hearty, warming dinner that makes everyone actually sit down at the table.
Recipe Overview
- Prep Time: 15 minutes
- Cook Time: 30 minutes
- Total Time: 45 minutes
- Servings: 6
- Difficulty: Easy
Why You’ll Love This Green Chile Chicken Enchilada Casserole
- One-Dish Wonder: Everything layers into a single baking dish, meaning you’re left with just one pan to wash at the end of a busy evening.
- Ready in Under an Hour: From chopping the first onion to pulling the golden, bubbling dish from the oven, you’ll have dinner on the table in 45 minutes flat.
- Make-Ahead Friendly: Assemble the entire casserole the night before, store it in the fridge, and simply bake it when you walk through the door the next day.
- Uses Pantry Staples: Canned green chiles, tortillas, and shredded chicken are items I almost always have on hand, which makes this a reliable emergency dinner.
- Family-Approved Flavour: The creamy, mildly spiced filling with tender chicken and melted cheese is a combination that even the pickiest eaters at my table devour without complaint, much like this Easy Creamy Baked Macaroni and Cheese.
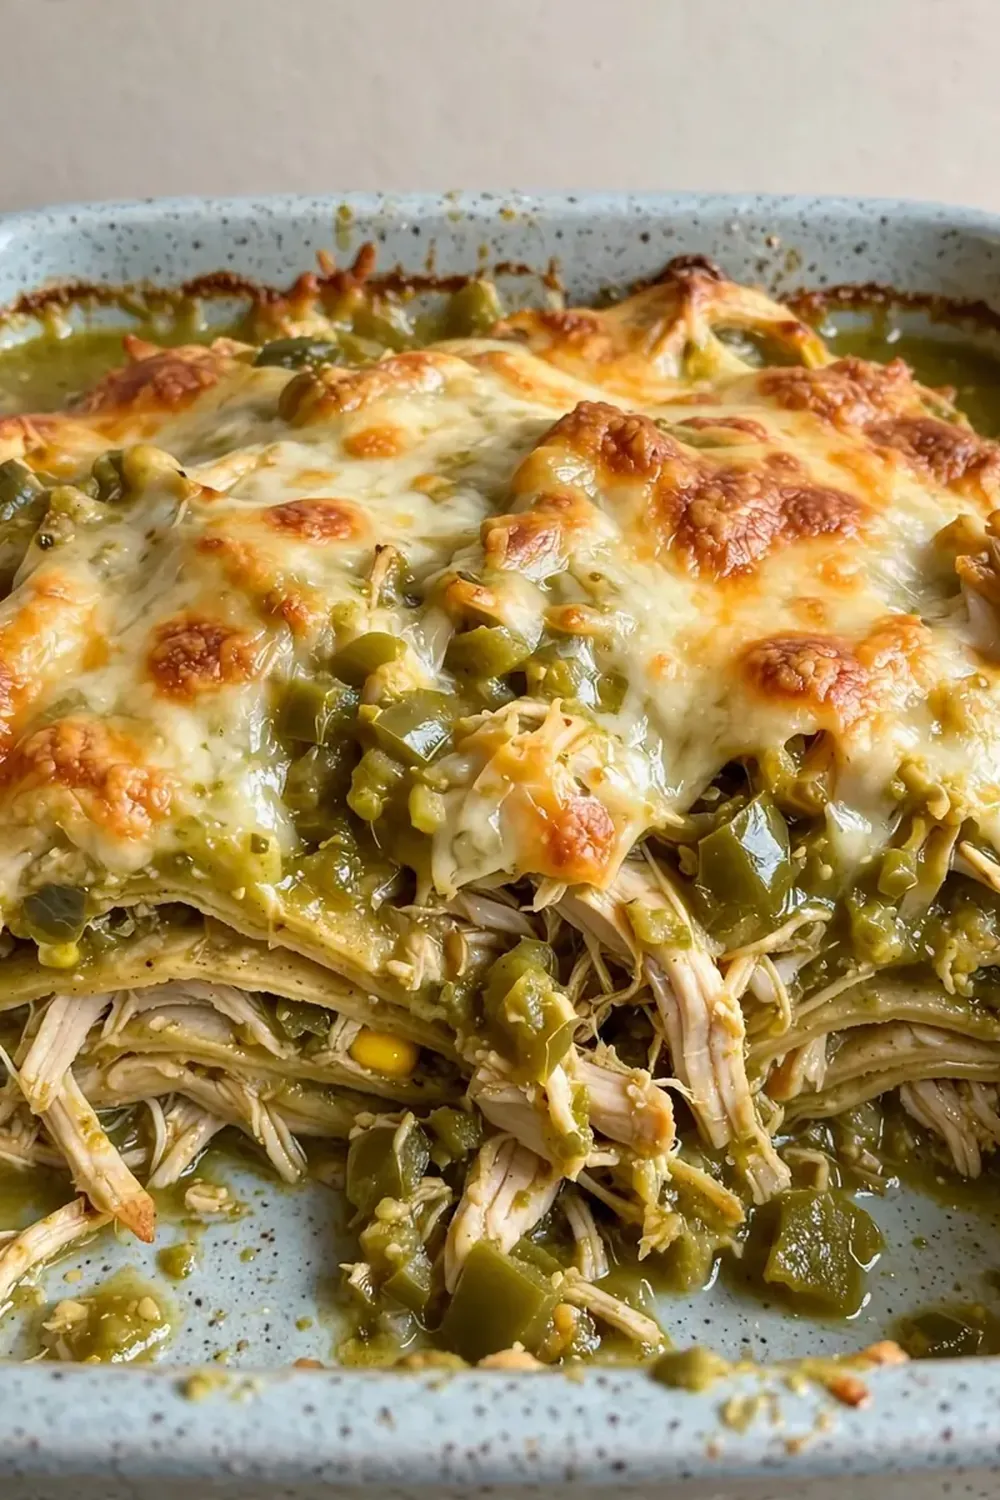
Ingredients You’ll Need
- 500g cooked chicken, shredded (from a rotisserie chicken works brilliantly)
- 400g can of green chiles, drained
- 300ml sour cream
- 200ml chicken stock
- 1 teaspoon ground cumin
- 1 teaspoon garlic powder
- ½ teaspoon onion powder
- Salt and black pepper, to taste
- 8 medium soft corn tortillas
- 300g grated cheddar or Monterey Jack cheese
- 1 medium onion, finely diced
- 2 tablespoons olive oil
- Fresh coriander, for garnish (optional)
- 1 lime, cut into wedges (optional)
Tip: To make shredding chicken effortless, use the paddle attachment of your stand mixer on low speed for about 30 seconds — it pulls the meat apart without any manual work.
How to Make Green Chile Chicken Enchilada Casserole
- Preheat the oven to 190°C (170°C fan). While it heats, warm the olive oil in a small frying pan over a medium heat. Add the diced onion and cook for 4–5 minutes, until it turns translucent and releases a sweet, savoury aroma. You’ll know it’s ready when the edges just begin to brown.
- Prepare the creamy filling. In a large mixing bowl, combine the shredded chicken, drained green chiles, sour cream, chicken stock, cumin, garlic powder, onion powder, and a generous pinch of salt and pepper. Stir everything together until the mixture looks uniformly pale green and smells fragrantly of cumin and chiles.
- Begin layering the casserole. Spread a thin layer of the chicken mixture (about 4 tablespoons) across the bottom of your 9×13 inch baking dish. This prevents the tortillas from sticking. Arrange 4 tortillas over the sauce, tearing them to fit if necessary, so they cover the base completely.
- Add the first full layer. Spoon half of the remaining chicken mixture over the tortillas and spread it evenly with the back of a spoon. Sprinkle one-third of the grated cheese over the top. You should see a thick, creamy layer dotted with flecks of green chile.
- Repeat the layers. Place another 4 tortillas on top of the cheese, pressing down gently. Spread the rest of the chicken mixture over these tortillas, making sure it reaches the edges. The filling should look thick and slightly glossy. Sprinkle another third of the cheese over this layer.
- Bake until bubbly and golden. Cover the dish tightly with aluminium foil and bake for 20 minutes. Remove the foil and continue baking for another 10 minutes. The casserole is ready when the cheese on top is melted and bubbling, with golden-brown patches forming around the edges. The filling should be visibly steaming and the tortillas will have softened completely.
- Rest before serving. Let the casserole sit on the counter for 5 minutes. This allows the layers to set slightly, so when you cut into it, the slices hold their shape rather than turning into a sloppy pile. Garnish with fresh coriander and lime wedges if desired.
Tips From My Kitchen
- Use day-old tortillas: Slightly stale corn tortillas absorb the creamy sauce better than fresh ones, preventing the casserole from becoming watery. If your tortillas are fresh, leave them on the counter for an hour to dry out a little before using.
- Shred your own cheese: Pre-shredded cheese contains starches that stop it from melting smoothly. Grating a block of cheddar or Monterey Jack yourself takes two minutes and ensures a silky, cohesive topping that stretches beautifully.
- Don’t skip the resting time: Those five minutes after baking are crucial. The casserole continues to set as it cools slightly, meaning your serving spoon will cut clean, defined squares instead of a messy scoop.
- Double the recipe for freezing: This casserole freezes exceptionally well. Assemble it in a disposable aluminium tray, cover tightly with foil and a layer of cling film, and freeze for up to three months. Bake from frozen at 180°C for 45 minutes, removing the foil for the last 10.
- Adjust the heat level easily: The canned green chiles in this recipe are mild, but you can swap them for a hotter variety or add a finely diced fresh jalapeño to the filling if your family enjoys more spice.
- Line your dish for zero cleanup: For the ultimate minimal-cleanup dinner, line your baking dish with parchment paper or foil before layering. After dinner, simply lift out the liner and toss it — the dish stays perfectly clean.
Equipment You’ll Need
- 9×13 inch baking dish
- Aluminium foil
- Mixing bowls
- Sharp knife
- Cutting board
- Small frying pan
- Wooden spoon or spatula
- Grater (if using block cheese)
Common Mistakes to Avoid
- Overcrowding the pan: If your baking dish is too small, the filling will bubble over and create a burnt mess on the bottom of your oven. Stick to the 9×13 inch size, and if you need to scale up, use two separate dishes rather than one overfilled one.
- Wrong temperature: Baking at too high a temperature will cause the cheese to brown before the centre is hot. Conversely, too low a temperature leaves you with a soggy, undercooked casserole. The sweet spot is 190°C (170°C fan) for the perfect balance of a golden top and a steaming interior.
- Skipping the rest time: Cutting into the casserole immediately after baking releases all the steam and causes the layers to slide apart. That short five-minute rest allows the starches in the tortillas to absorb excess moisture, giving you neat, tidy portions that look as good as they taste.
Delicious Variations to Try
- Spicy Version: Add one finely chopped fresh jalapeño or a teaspoon of chipotle paste to the chicken mixture. For extra heat, use pepper jack cheese instead of cheddar and sprinkle sliced pickled jalapeños over the top before baking.
- Vegetarian/Vegan Option: Replace the chicken with two cans of drained black beans and one can of sweetcorn. Use a plant-based sour cream and vegan cheese that melts well. The texture will be heartier, and the flavour remains deeply satisfying.
- Different Protein: Swap the chicken for shredded beef or turkey. Leftover roast beef or a batch of Ground Turkey Chili works beautifully here — just ensure the meat is well seasoned and not too dry before layering.
What to Serve With Green Chile Chicken Enchilada Casserole
- A simple side salad with crisp lettuce, sliced avocado, and a lime vinaigrette.
- Mexican-style rice or a quick cilantro-lime rice.
- Refried beans or black beans warmed with a pinch of cumin.
- Warm tortilla chips with fresh salsa or guacamole for dipping.
- A dollop of extra sour cream and a sprinkle of fresh coriander on each serving.
Still hungry for ideas? You might also love Budget Friendly Buffalo Chicken Breakfast Casserole Meal Prep, Low Carb Chicken Casserole from our sister kitchens.
Frequently Asked Questions
Green Chile Chicken Enchilada Casserole
Ingredients
Method
-
Preheat the oven to 190°C (170°C fan). While it heats, warm the olive oil in a small frying pan over a medium heat. Add the diced onion and cook for 4–5 minutes, until it turns translucent and releases a sweet, savoury aroma. You’ll know it’s ready when the edges just begin to brown.
-
Prepare the creamy filling. In a large mixing bowl, combine the shredded chicken, drained green chiles, sour cream, chicken stock, cumin, garlic powder, onion powder, and a generous pinch of salt and pepper. Stir everything together until the mixture looks uniformly pale green and smells fragrantly of cumin and chiles.
-
Begin layering the casserole. Spread a thin layer of the chicken mixture (about 4 tablespoons) across the bottom of your 9×13 inch baking dish. This prevents the tortillas from sticking. Arrange 4 tortillas over the sauce, tearing them to fit if necessary, so they cover the base completely.
-
Add the first full layer. Spoon half of the remaining chicken mixture over the tortillas and spread it evenly with the back of a spoon. Sprinkle one-third of the grated cheese over the top. You should see a thick, creamy layer dotted with flecks of green chile.
-
Repeat the layers. Place another 4 tortillas on top of the cheese, pressing down gently. Spread the rest of the chicken mixture over these tortillas, making sure it reaches the edges. The filling should look thick and slightly glossy. Sprinkle another third of the cheese over this layer.
-
Bake until bubbly and golden. Cover the dish tightly with aluminium foil and bake for 20 minutes. Remove the foil and continue baking for another 10 minutes. The casserole is ready when the cheese on top is melted and bubbling, with golden-brown patches forming around the edges. The filling should be visibly steaming and the tortillas will have softened completely.
-
Rest before serving. Let the casserole sit on the counter for 5 minutes. This allows the layers to set slightly, so when you cut into it, the slices hold their shape rather than turning into a sloppy pile. Garnish with fresh coriander and lime wedges if desired.
Notes
I’ve been making this for over 7 years, and it never disappoints, especially on those evenings when I need to get dinner done without a fuss. This is my go-to recipe when I need something quick but impressive, and I hope it becomes a staple in your kitchen too. If you give it a try, I would love to hear how it turned out — drop a comment below and let me know what your family thought. For another speedy weeknight meal, you might also enjoy this Easy Weeknight Chicken And Sweet Corn Casserole, which follows the same one-dish philosophy.